Friday, March 30, 2012

Neon Pink and Coral French manicure

3 comments
Hi everyone!
This week I wanted to try something a bit different from what I usually do, so I decided to try doing my first home-made french manicure!

For this manicure I used the following colors :

  • Sally Hansen Hard as Nails Xtreme Wear Coral Reef #405
  • Sally Girl Mini  Neon Pink
  • Kiss Nail Art Paint Silver Glitter #SPA10


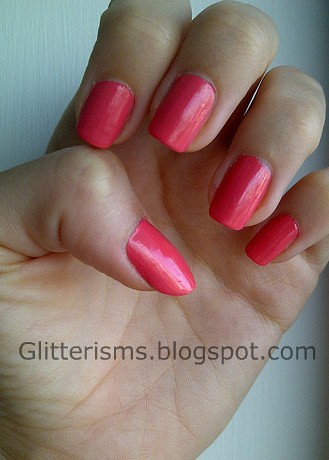
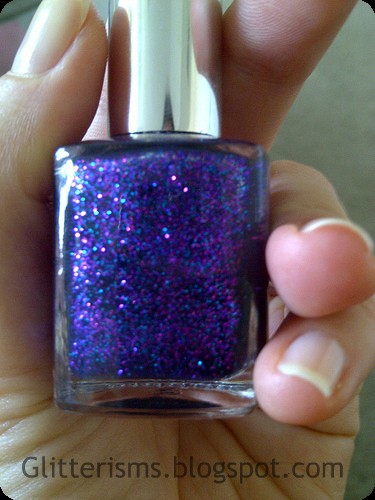
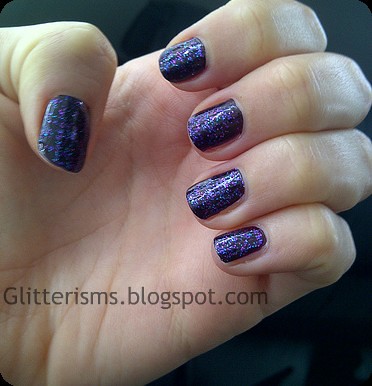
Here a swacth of Sally Hansen's Coral Reef,  which is a very pretty Coral. I know Corals are really trendy at the moment, and they're a shade that I really like. This one looks like a light pink in the bottle, but once applied to the nails it really seems to change color depending on the light, and gets really pretty orange accents.
I applied two coats.

BeFunky 
BeFunky 


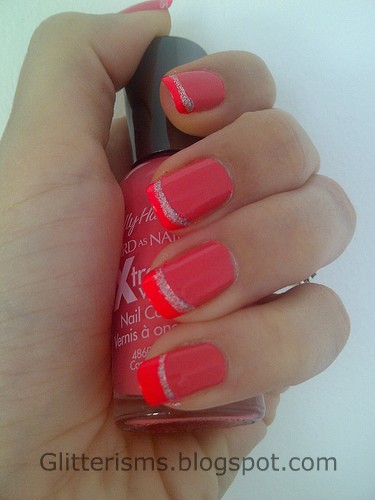
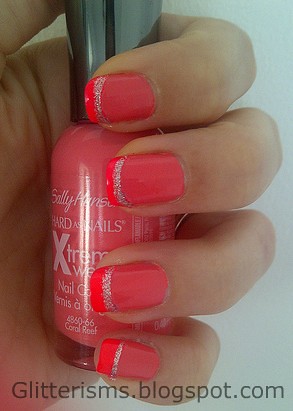
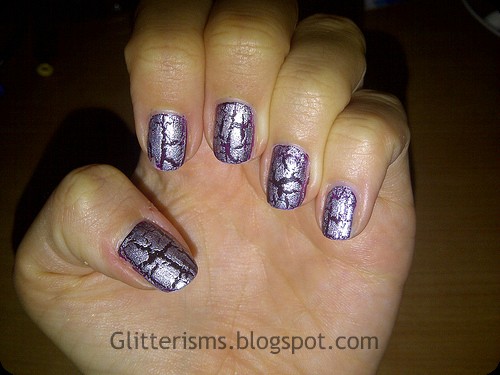
Then I used stickers to build my French Manicure. I chose to make Neon pink tips with a line of silver glitter with a thin brush: 

  BeFunky 
BeFunky 
BeFunky

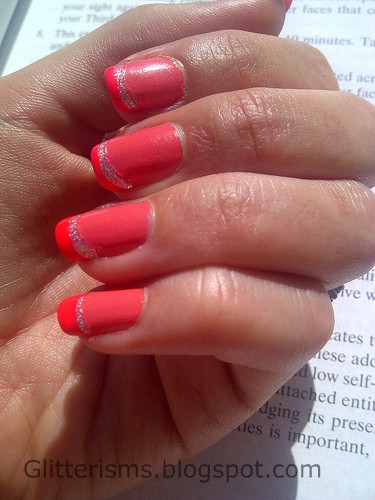
Here is a picture I took at my pool to show you how Coral Reef can really get orange accents with the sunlight. I love it!

BeFunky

Pin It

Wednesday, March 21, 2012

Glitters!

0 comments
Yes, this blog's name is Glitterisms, so you would definitely expect to find glitters here, don't you? ;-)
Well, yes I love glittersm but when it comes to nail polish, I'm not sure... It looks gorgeous and it lasts a really long time without chipping, but that's kind of the problem. It will literally never chip, and it's a pain to remove! Not only will you spend a lot of time (and nail polish remover) taking it off, you will also damage your nails if you insist too much, because glitters will work as a nail scrub.
Therefore I try to keep Glitters for special occasions only... or until I can't hold myself anymore and need to yield to temptation!

Here is my most recent glitters polish acquisition and I am very proud to say that I bough it in October! Yes yes, almost 6 months of not buying anything glittery (at least for my nails, hehe, what did you think?!). Anyways, here is my little treasure : Pure Ice Cheatin. It is a transparent polish with loads of purple and blue glitters. I love how it looks in the bottle.

BeFunky 

Feet are the only part of the body where I don't feel too guilty putting all glitters polish. Here's what it looks like, after 3-4 coats:

BeFunky 

On my handsm I applied a coat of the Ice on top of two coats of my super cute Mini Orly Naugty or Nice. I think I almost like it better like this than alone.

BeFunky 

Obviously, a couple of weeks later, when it was really time to take off the 100% pure glitters on my toes, the only thing I could do was... using the good ol' tin foil system! (for an explanation on how this works, take a look at Sarah Louise's very good tutorial)
BeFunky


Pin It

Sea, Sand and Sun Watermarble

2 comments
For my second Watermarble, I decided to use colors that make me think of Summer...
Pastel colors were trendy last Winter so I stocked up on these shades, and I really love them! They can be combined and create really pretty manicures.


For this manicure, I used :

  • Base and Top Coat : Orly Nail Defense
  • New York Color French White tip #134
  • Confetti Blue glitz #109 ~ a very subtle light baby blue with a hint of darker blue pearly micro glitters
  • Confetti Belle of the Ball #071 ~ a shiny light purple
  • Confetti Margarita Senorita #008 ~ a light yellow... I usually don't like yellow polishes because they make me think of yellowed nails, but this one works fine for marbles and mixes well with other pastels

I started by prepping my nails with my Orly base, and then I applied a layer of White. The reason for that is that when you use light/pastel colors, you usually need to apply more than one layer of the color. If you don't the color will be too light and won't stand out too much. That is especially true with cheap polishes like the Confettis that tend to be very fluid. the problem when making a watermarble is that you can't have multiple layers of a single colors. Hence, the White layer helps "revealing" the colors more easily, without having the natural color of the nail interfering.


I'm usually very sloppy when applying my polish but I'm trying to better myself ;-)

After lots of patience, this is what it looked like in natural light!


Pin It

Crackled

0 comments
Whenever my nails are too short for a nice nail art, I usually go for crackle polish. I find it amazing because it creates a fun effect in no time, and it's super easy to apply.
Plus, it's great for sloppy people like me who mess up their first layer and who want to cover it up, instead of starting over with a new manicure ;-P
Here are some of my latest attempts. For all of them I used the Sally Hansen Crackle Overcoat Fractured Foil #03, and changed the color of the layer underneath.


Here with the Confetti Centerstage #077, a very pretty purple with pink and blue micro-nano glitters. The Crackle was applied in a thick layer, which creates these wide and deep crackles.

BeFunky

BeFunky


Here with Sally Hansen Hard as Nails Xtreme Wear Mint Sorbet #340. I'm normally not a fan of green polishes (and of green in general!!) but I love the frosty, minty effect of this shade, which is emphasized by the silver sparkles of the Crackle.
Yes, one of these fingers isn't mine ;-P

BeFunky


And finally, my latest Crackle, that I removed yesterday! This one was done with Sinful Colors Professional in shade Hazard #952. This Sinful Colors is one of my latest acquisitions, and I absolutely love it! For some reason I've been addicted to Corals and Oranges lately, and this one seems to be a perfect mix of both colors (although I hope to find a Neon Coral polish ASAP ;-)
Here, I applied the Crackle in a very thin layer which allowed me to get thin and numerous crackles.

BeFunky


Pin It

First Post!

0 comments
Hi everyone!
Welcome to my new blog!
Here I will share with you my manicures and nailarts. Hope you enjoy them! Pin It